Column Mapping
After selecting your data source (whether from a file upload, database, or cloud storage), the column mapping screen lets you control exactly which columns are imported and how they are named. This is your opportunity to clean up column names and exclude irrelevant data before it enters your project.
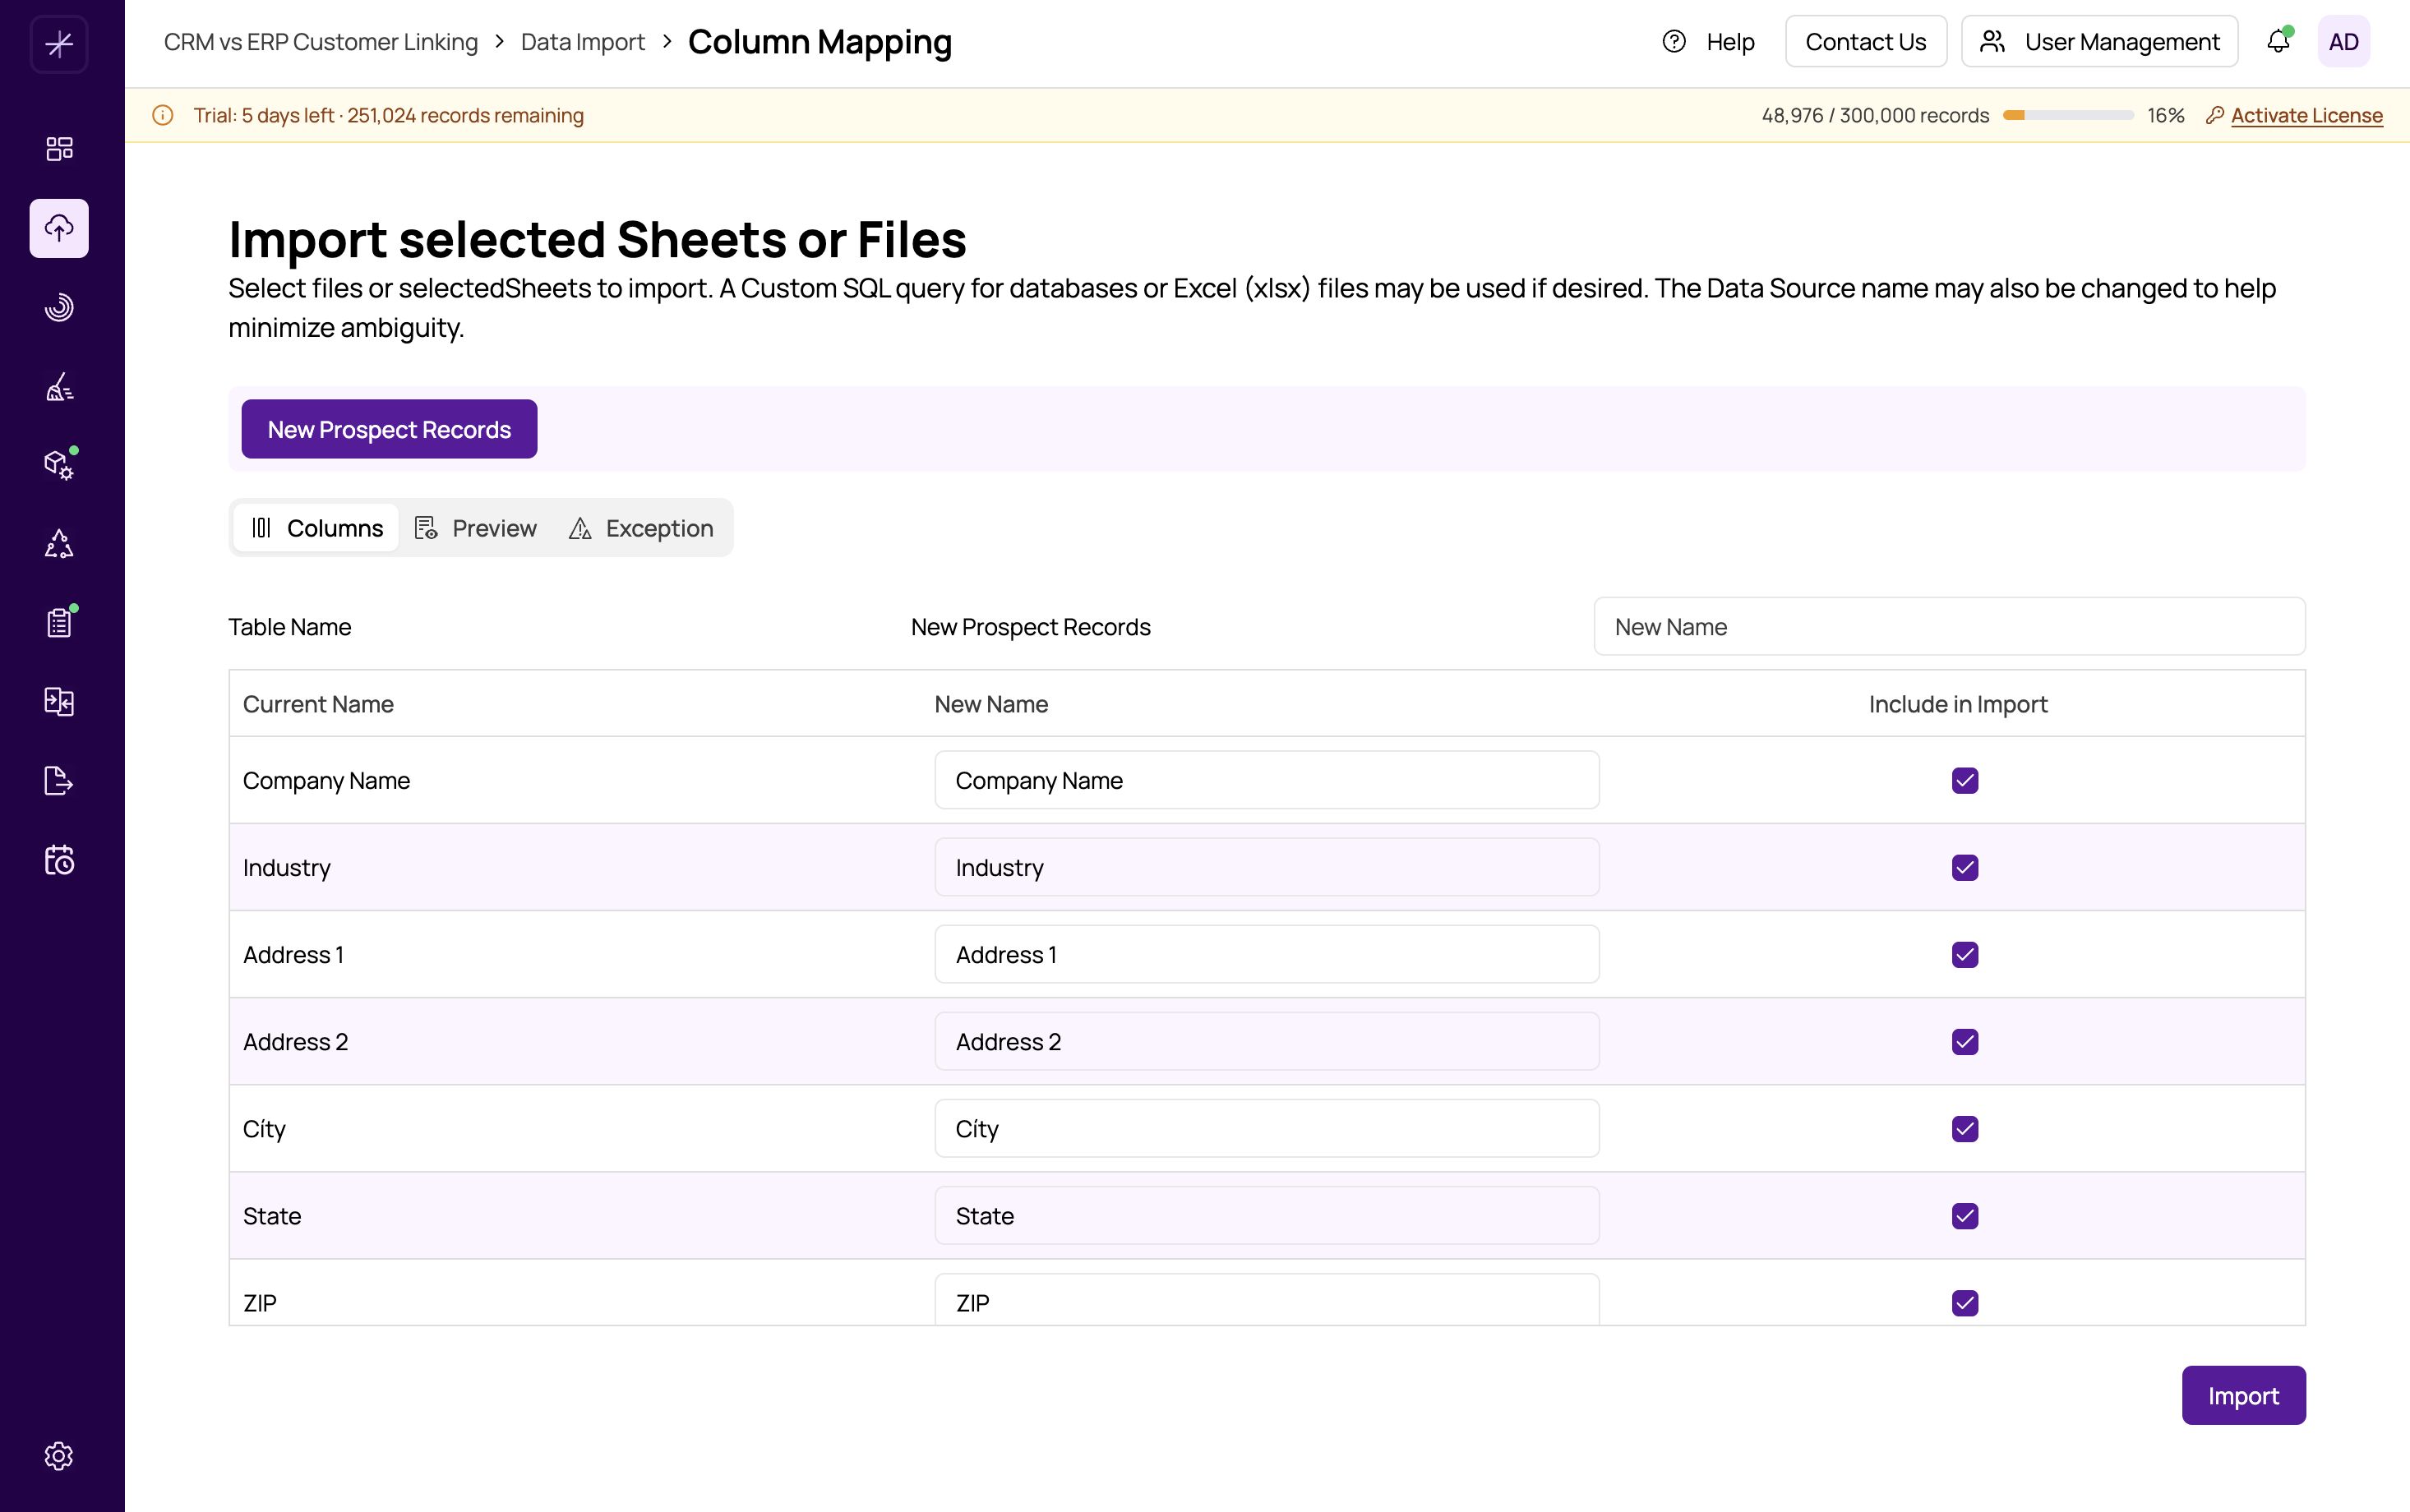
The Column Mapping Table
The column mapping screen displays a table with one row per detected column. Each row contains:
- Current Name — The original column name as it appears in the source file or database table. This field is read-only.
- New Name — The name this column will have in MatchLogic after import. By default, this is the same as the current name, but you can edit it to anything you prefer.
- Include — A checkbox indicating whether the column will be imported. All columns are included by default. Uncheck this box to exclude a column from the import.
Renaming Columns
To rename a column, click the New Name field for that column and type the desired name. Renaming is useful when:
- The source column names are cryptic or system-generated (e.g.,
COL_001instead ofFirstName). - You want consistent naming across multiple datasources to make field mapping easier later in the pipeline.
- The original names contain special characters or are excessively long.
Tip
If you plan to match records across multiple datasources, use the same column names for equivalent fields (e.g., always use "FirstName" instead of mixing "First_Name," "first_name," and "fname"). This makes auto-mapping in the Match Definitions stage more effective.
Excluding Columns
Uncheck the Include checkbox for any column you do not need. Excluded columns are not imported and will not be available in any downstream modules. This is useful for removing columns that contain internal identifiers, timestamps, or other data irrelevant to your matching goals.
Important
You must include at least one column. If all columns are unchecked, the Import button will be disabled and an error message will appear.
Handling Multiple Sheets or Tables
If your source has multiple sheets (Excel) or you selected multiple tables (database), tab buttons appear at the top of the column mapping screen. Click each tab to view and configure the columns for that sheet or table. Each sheet/table is imported as a separate datasource within your project.
Duplicate Column Names
MatchLogic checks for duplicate column names in the New Name field. If two or more columns share the same new name, an error message will appear and you will not be able to proceed until the conflict is resolved. Either rename one of the duplicates or exclude it from the import.
Completing the Column Mapping
Once you have reviewed and configured all columns:
- Verify the New Name values are clear and consistent.
- Confirm that only the columns you need are checked under Include.
- Click Import to start the import job.
After clicking Import, a background job begins processing your data. You can monitor its progress through the job status indicator. Once complete, your datasource will appear in the datasource list. See https://help.matchlogic.io/article/219-managing-datasources for how to work with imported datasources.