Creating a Scheduled Workflow
Creating a scheduled workflow takes only a few minutes once your MatchLogic project is fully configured. The creation form walks you through naming the workflow, selecting the project, choosing which pipeline steps to run, and setting a schedule.
Opening the Creation Form
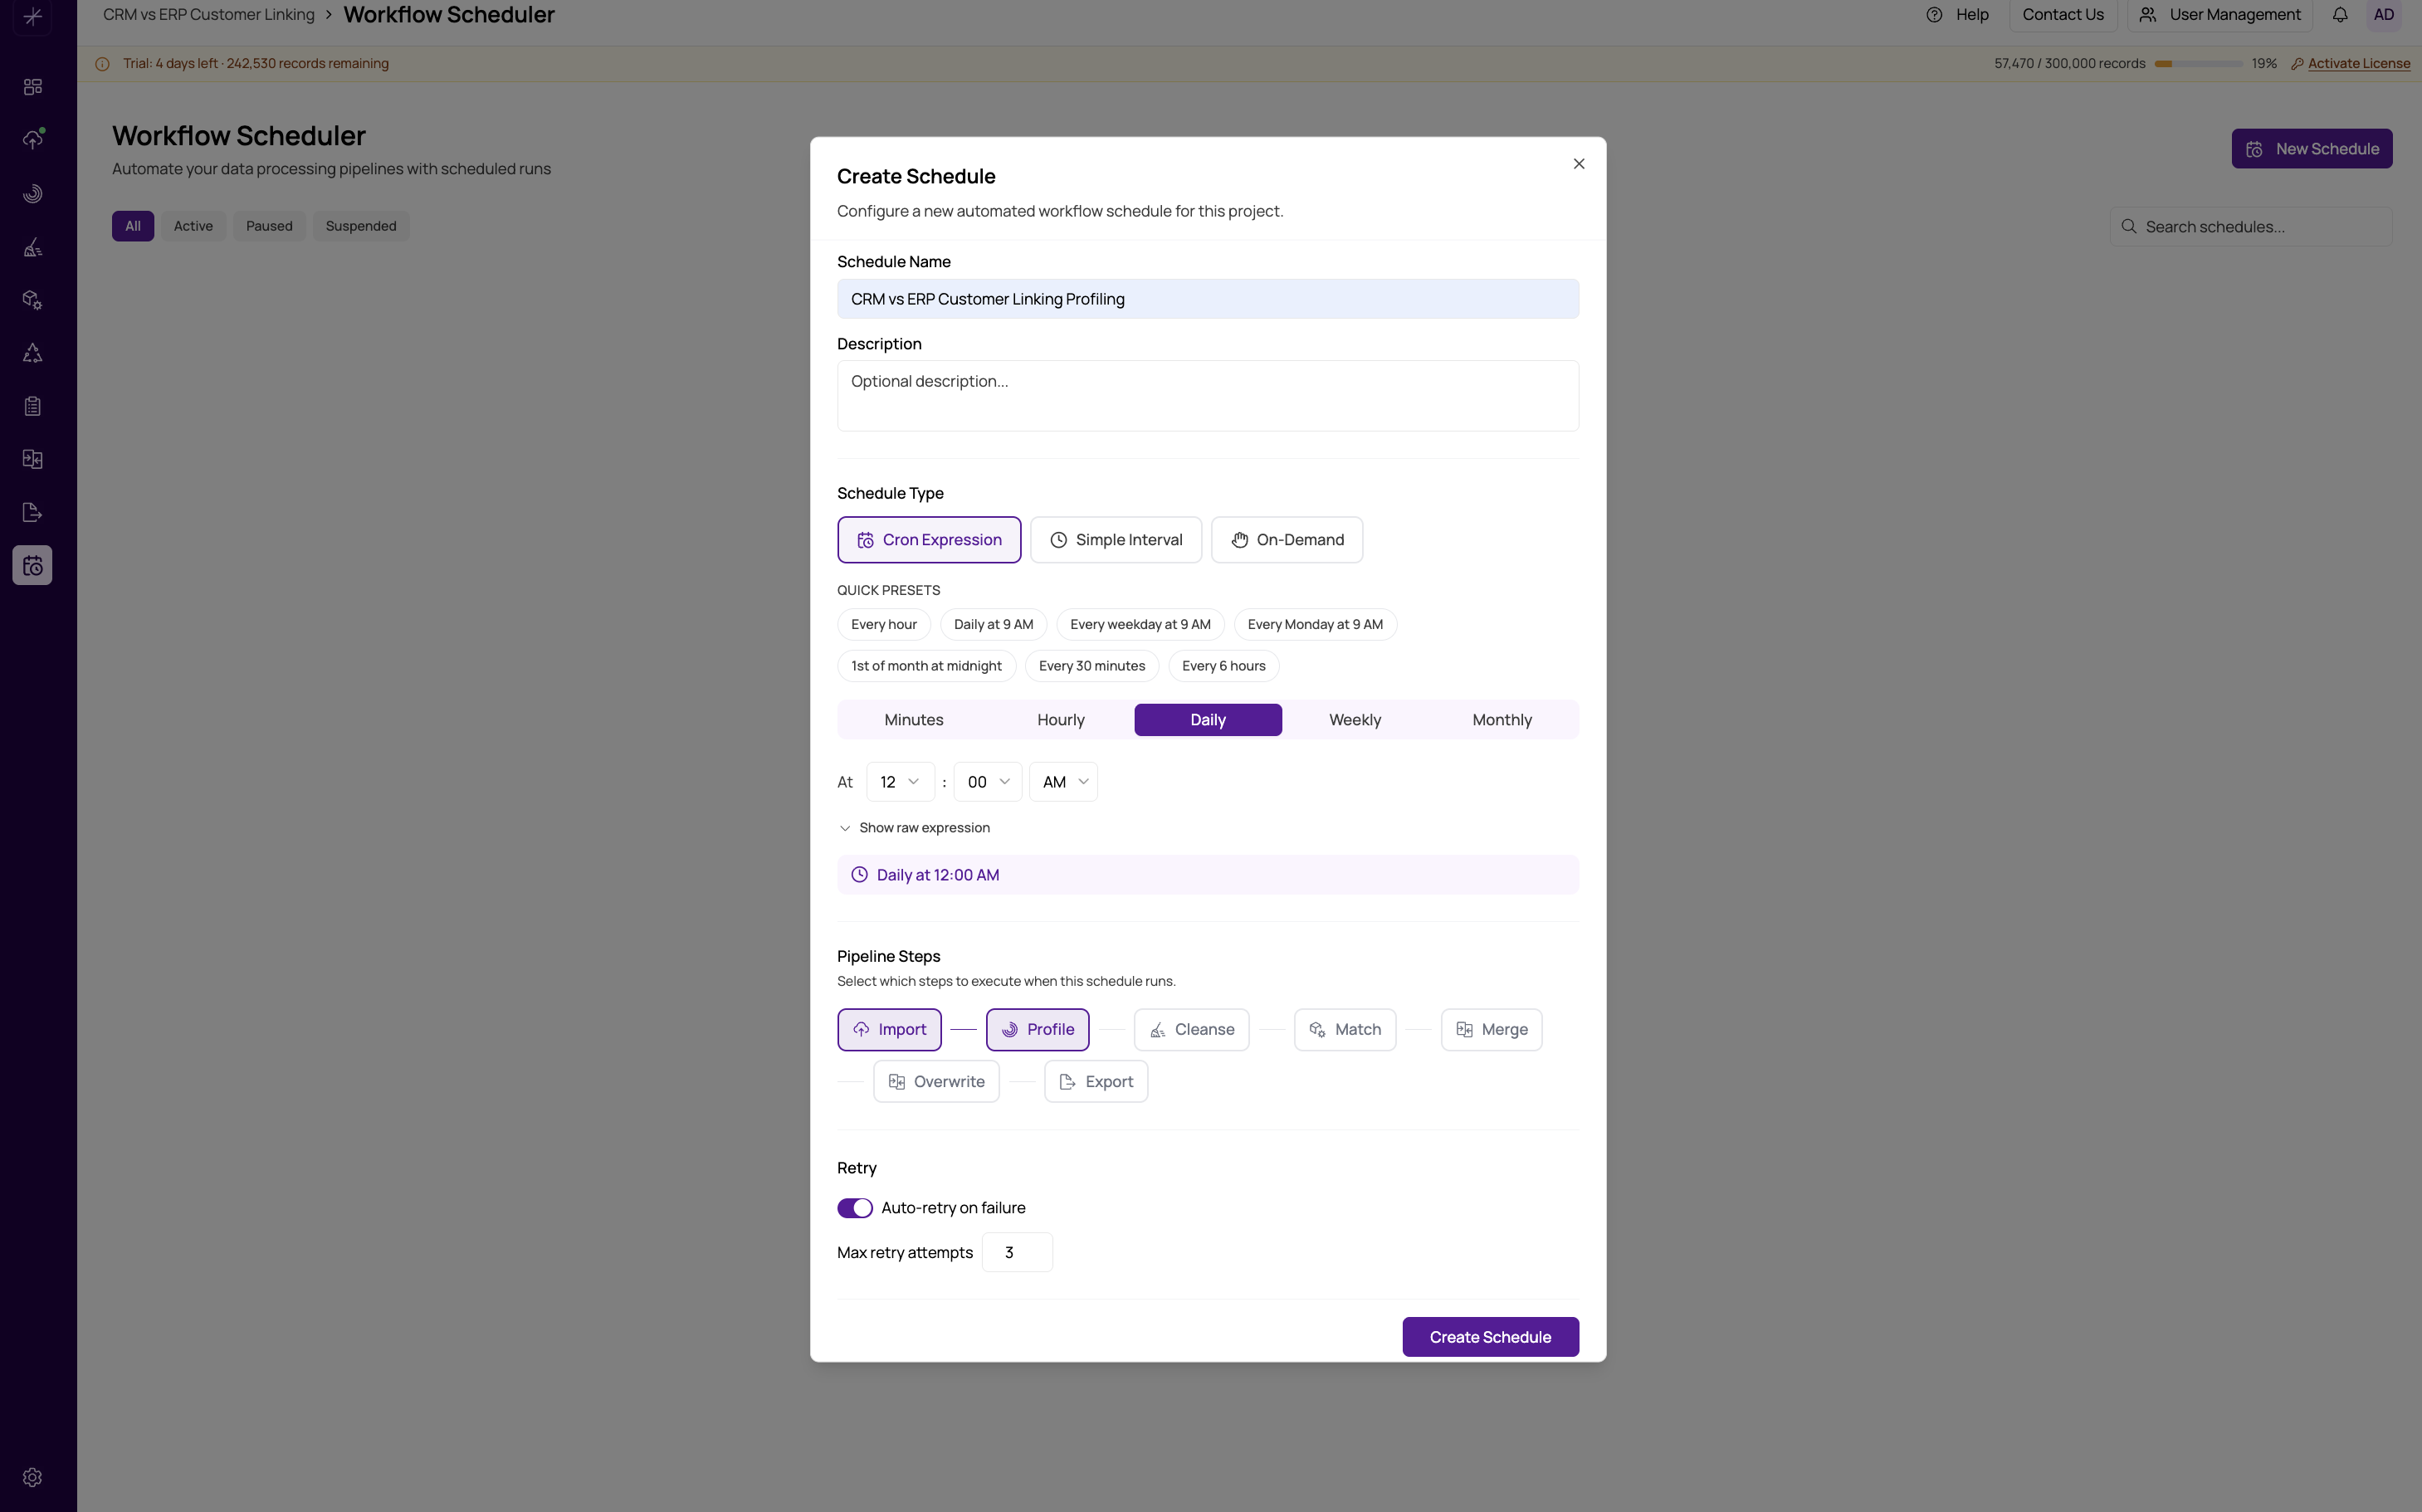
Navigate to the Workflow Scheduler section from the left sidebar. On the main scheduler page, click New Workflow in the top-right corner. The workflow creation form opens as a panel or dialog.
Step 1 — Name and Project
Give the workflow a descriptive name that identifies what it does, such as "Nightly Customer Dedup" or "Weekly Supplier Match." Names are displayed in the workflow list and execution history, so a clear name makes management easier.
Select the project this workflow will run against from the project dropdown. Only projects you have access to are listed. All pipeline configuration — match definitions, cleansing rules, export settings — is read from whichever project you select here.
The project must have all required pipeline steps configured before you save the workflow. For example, if you include the Match step, the project must already have match definitions set up. The system validates this when you save, not when the workflow runs.
Step 2 — Choose Pipeline Steps
Use the step checkboxes to select which pipeline stages this workflow should execute. The available steps are:
- Import
- Profile
- Cleanse
- Match
- Merge
- Overwrite
- Export
Steps must be contiguous — enabling a later step automatically enables all prior steps. For example, selecting Match will also select Import, Profile, and Cleanse. You cannot run Match without first running the upstream steps within the same execution.
See Choosing Pipeline Steps for guidance on which steps to include.
Step 3 — Set a Schedule
Choose one of the three schedule types:
- Simple — enter a number and a unit (minutes, hours, days).
- Cron — enter a cron expression or use the visual cron builder.
- On-Demand — no automatic schedule; run manually only.
After entering a simple or cron schedule, the form shows the next 5 upcoming execution times so you can confirm the schedule is correct before saving. See Schedule Types and Building Cron Expressions for details.
Step 4 — Optional Settings
Before saving you can also configure:
- Notifications — email alerts on success or failure. See Notification Settings.
- Retries — how many times to retry on failure. See Retry Configuration.
Saving the Workflow
Click Save to create the workflow. It is created in Active state immediately, meaning it will execute at the next scheduled time. If you chose On-Demand, it will wait until you trigger it manually.
The new workflow appears in the scheduler list with its name, project, schedule summary, and next run time displayed.
You can edit a workflow after creation to change its name, steps, schedule, or notification settings. Changes to the schedule take effect immediately — the next run time updates to reflect the new schedule.