Export to Database
MatchLogic can export your processed data directly into a relational database, eliminating the need for intermediate files. This is the preferred option when your matched and deduplicated data needs to feed into a production system, data warehouse, or reporting database.
Supported Databases
- SQL Server — Microsoft SQL Server (all recent versions). Default port: 1433.
- MySQL — MySQL and compatible forks (MariaDB). Default port: 3306.
- PostgreSQL — PostgreSQL 10 and later. Default port: 5432.
Connection Settings
Enter the following details to connect to your target database:
- Host — The server address or hostname (e.g.,
db.example.comor192.168.1.100). - Port — The database port. Pre-filled with the default for the selected database type.
- Database — The name of the target database where the table will be created or written to.
- Username — A database user with write permissions on the target database.
- Password — The password for the specified user. Connection credentials are encrypted before storage.
Click the Test Connection button to verify that MatchLogic can reach the database before proceeding.
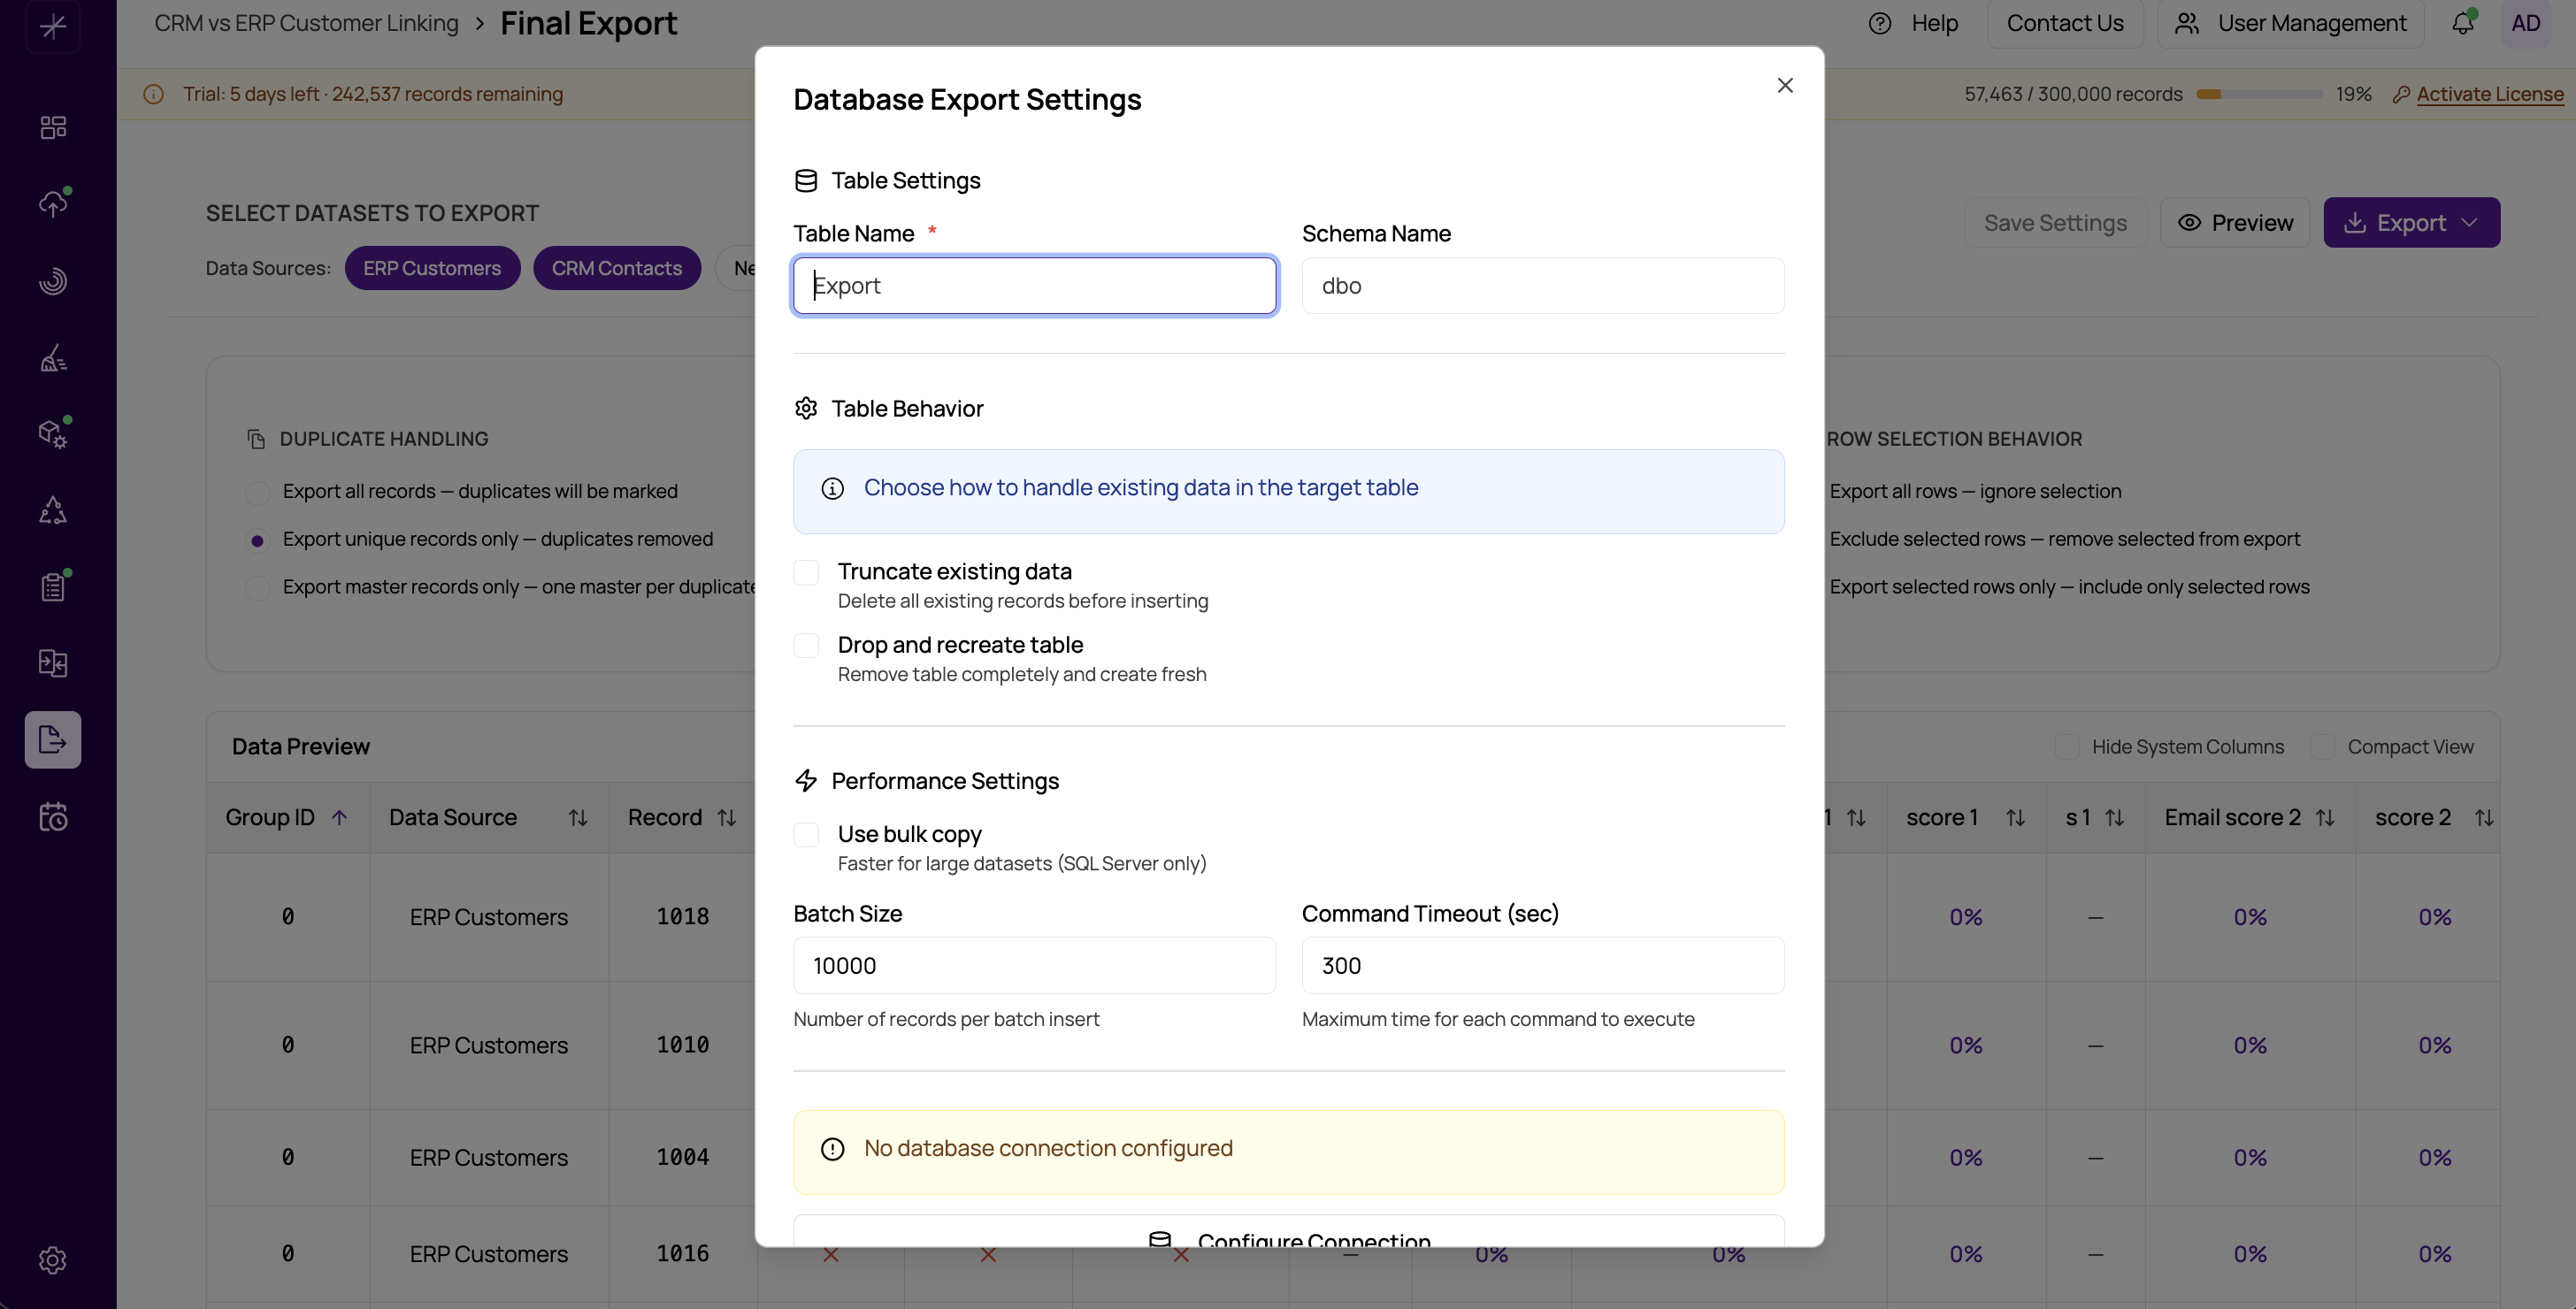
Table Settings
- Table Name — The name of the target table in the database.
- Schema — The database schema (e.g.,
dbofor SQL Server). Defaults to the database's default schema if not specified. - Truncate Existing Table — If the table already exists, delete all rows before inserting new data. The table structure is preserved.
- Drop and Recreate — If the table already exists, drop it entirely and recreate it based on the export columns. This ensures the schema matches your current data.
- Bulk Copy Mode — Uses the database's native bulk insert mechanism for faster performance. Recommended for large exports.
- Batch Size — The number of rows inserted per batch during bulk operations. Larger batches are faster but use more memory.
Step by Step
- Select the database type (SQL Server, MySQL, or PostgreSQL).
- Enter the connection details and click Test Connection.
- Enter the target table name and schema.
- Choose whether to truncate or drop and recreate the table.
- Enable bulk copy mode for large datasets.
- Click Preview to verify the data (see previewing-export-data).
- Click Export to start writing data to the database.
Tip
For detailed information about advanced database export settings such as command timeout, batch size tuning, and schema-matching options, see database-export-settings-reference.
Important
The database user must have sufficient permissions to create tables, insert data, and (if using drop and recreate) drop tables. If you encounter permission errors, contact your database administrator.